
Here is the final week;

The spread came together with many leftover elements from both the Copper Mountain Project Life Kit and the Storm King add-on, both from Studio Calico. It seriously bugs me that there are typos on one card and since its the only one I have they have to stay...

The calendar page is from a new calendar that I purchased for 2014 that actually started with November 2013. I kept the two months that I tore off and realized they were the perfect size so hello title card. I added two veneer brackets from Studio Calico that I embossed with Gold Glitter Zing.

I love that many of the photos I used here were already in my December Daily so the edits were pretty much done for me, I really only had to edit for size and print.

Because my spread went a bit long so I could end on the 31st I needed some extra room so I made an insert using the Design G protector. I love this size, it's the perfect mix of horizontal, vertical and some 3x4's.


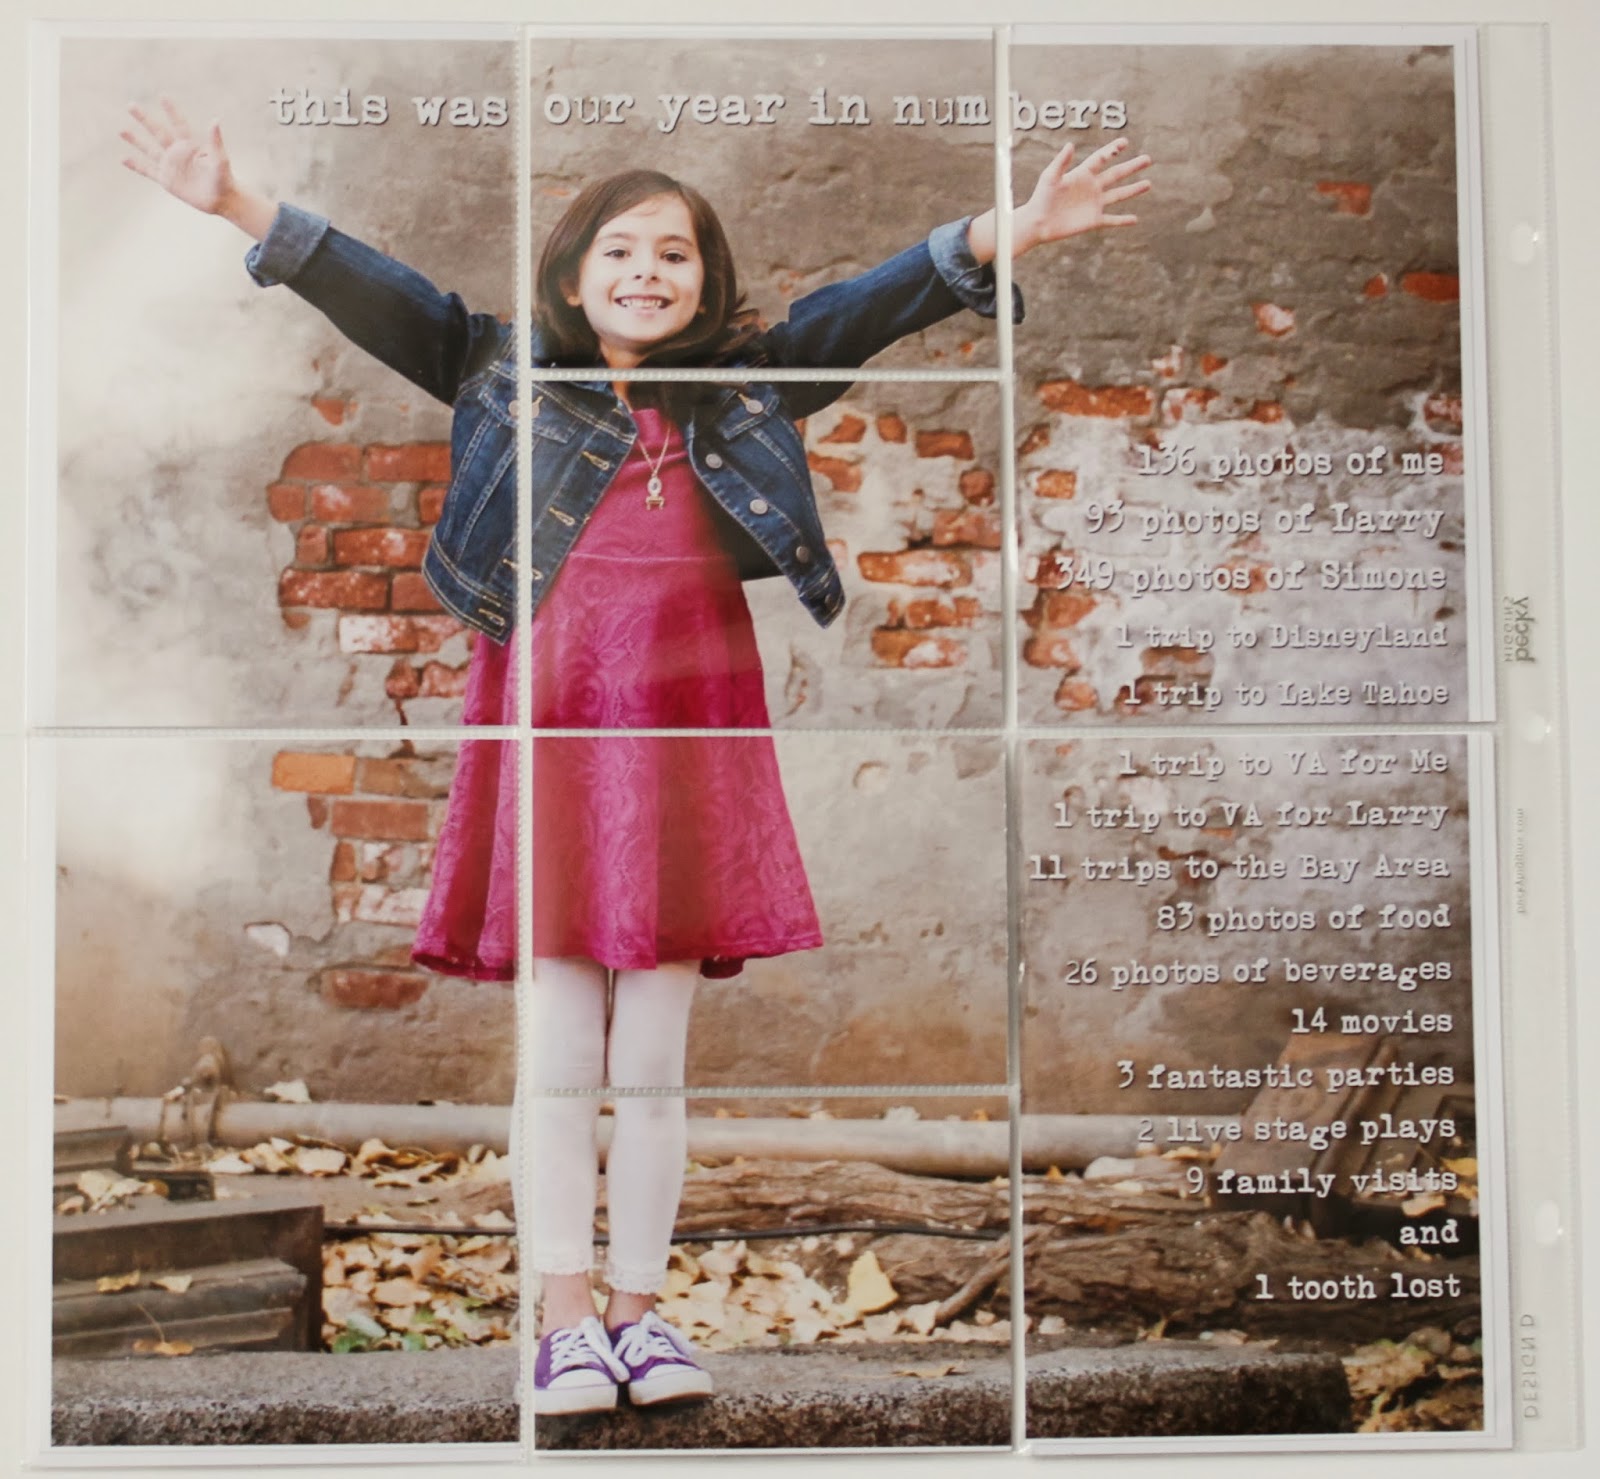
Last year was the first year that I closed my album with a year in numbers review. I loved it and decided to do it again this year. Plus I loved this photo from our family photo shoot and it was the perfect choice to use for this. It doesn't take that long to count everything up and its super fun to see how the numbers changed vs. last year. I'm having it printed as we speak so when its all done I'll cut this 12x12 image into the proper sections to fit into the back of my last page. When its done I'll add another photo of it inside the protector.

here's a snap I posted on Instagram of me doing the counting this past Sunday during the football game.

Here is a look at the print after it was cut and placed in the protector. I ended up cutting some plain cardstock that was a bit larger than 4 x 6 because the slots are a tiny smidgen bigger. Because of that my photo was not lining up the way I liked and was looking off. Having the 4 1/8" x 6 1/8" bases helped a lot for tightening up the alignment. I made sure to attach those four sections to the very edge of the cardstock along the middle and top or bottom edge. The center section of 4 x 3 photos were just slide into the protector as is.
I also had large size prints made for the last page of my volume one

and the first page of my volume two.

I haven't started anything for 2014 yet, not even my title page. I needed a break and plan to get right back into it later this week so I'll post all of that soon.
As far as I know I'll keep the same plan in place as I did last year but who knows what might happen when I actually sit down to work on it.
Today I'm just relishing in the joy of these completed albums and how much fun it is to look back on the year and see all that we did, it certainly was a really great year.

You are seriously my Project Life hero! I've never completed a year, and I've done it for 3 years now, LOL.
ReplyDelete