Friday, December 27, 2013

Studio Calico Copper Mountain full reveal

Studio Calico's January kits, Copper Mountain are now available for presale for subscribers!  All links shared here and below will be active for subscribers as of now and active for non subscribers tonight at midnight EST.


This being my first month on the design team I had no idea what to expect when my package arrived.  Needless to say it was a bit surreal and oh so exciting to grab that box when it arrived.


I had so much fun with all of the products and made two Project Life® spreads with the contents.  For my main kit only spread (Copper Mountain) I worked with my week 50 photos, the one where my daughter turned 6.  As you can see below I went super sized for the right hand side and used this months digital template. In fact this spread has several digital elements mixed in with some of my most favorite cards from the main kit.  I mean that heart card, it was a must use for sure as was the black quote card, it paired perfectly with my photo for the design team announcement.


I interviewed my daughter six months ago on her half birthday and I loved her responses to the questions so on her birthday I asked her the same questions and these were her answers. It was the perfect pair for the large photo and the puffy asterisks were the perfect accent to use here.  It also really helped tie this side of the spread to the left because the colors of the asterisks match the heart card perfectly.  Not to mention the adorable wood veneer in the kit, I just love the font especially the little flouncy bits on some of the letters.


For my second spread I used the two, yes you heard that correct we now have two add-ons for the Project Life® kits starting in January (Union Meadows and Storm King).  I loved the colors and they just tied in so well with my Week 49 photos and our trip to Lake Tahoe.  This spread below uses elements from both of the add-ons.


There were so many great quote cards included in the two add-ons and they worked so well with the photos they ended up being a great compliment.


This watercolor card had to happen for the title, the blue just matched so well with my Lake Tahoe picture and helped draw the blue to the right side for some balance. I just stamped the dates in gold ink and added a few more puffy asterisks and it was done, super fast and easy.

I loved the hashtag cards and really loved incorporating them in.  Studio Calico must be inside my head when they design these kits because they always seem to have just the right cards for my lifestyle, its just such a great match.


There are also some very, very cute shop items this month that I made sure to pick up for myself. 

I mean how cute is this little Valentine's Day pack...you can find it here.


And these super cute calendar cards that Marcy designed, you get four of each so you'll have more than enough to included them each week if you wanted to.  I will definitely be adding these into my project life spreads for 2014.


If you prefer to label your spreads by week number, there is even a super cute option for that as well.  Also designed by Marcy these week number cards are a perfect option.


I cannot wait to continue on with Project Life® and cannot wait to see what amazing things Studio Calico has in store for us with their kits.  After seeing what they did with January, I expect really great things.  If you haven't yet subscribed now is the perfect time, you can do so right here.

post signature

Monday, December 23, 2013

Studio Calico Copper Mountain Sneak Peeks

It's almost time for the full reveal of the January Studio Calico kits but until then I have some sneak peeks to show you.  This months Project Life® kit called Copper Mountain which was an absolutely a blast to work with and I had a lot of fun putting two spreads together for the gallery.

These first two sneaks are using supplies from the Main Kit only


This sneak is from my Main Kit layout but shows some of the January Digital files.


And this one shows a few different sneaks of the spread I made using a mix of all three; the main Copper Mountain Project Life® kit and the two add-ons; Union Meadows and Storm King.


You can see more images and further sneaks over at Studio Calico right here.

I hope you'll join us for the full reveal at January 28th at Midnight Eastern time or Noon Eastern Time on January 27th if you are a subscriber.  I think you'll absolutely love the kits.


post signature

Thursday, December 19, 2013

December Daily 2013 - days 11 to 17

It's been so crazy I just now had a chance to photograph and get these past few days posted, sorry for the delay.  I'm just about to leave for the airport to pick up family so I'm super excited! I've been waiting for a lot of the normal holiday type stuff until they arrive so I'm looking forward to including more of what we love to do the last few days of the season.

Day 11 a trip to the movies with some friends


Day 12 a work day in the Kindergarten class for me


Day 13 the big announcement. The perfect place to use the cute holiday card that came in my Studio Calico kit.


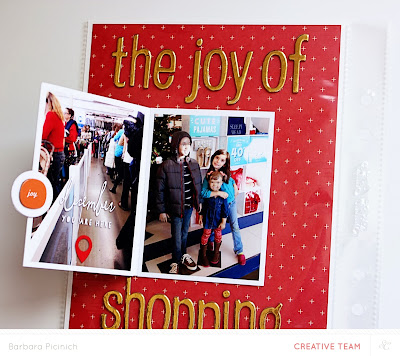
Day 14 some pictures of us getting some shopping done.  The card is attached on the outside of the protector and you'll see it open below.


Day 15 a girls day out to a super cute local craft fair and some yummy dessert.


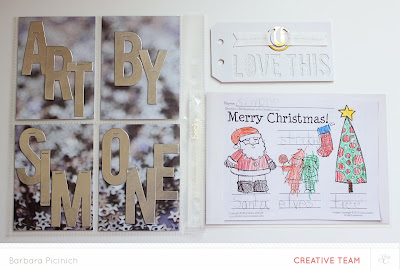
Day 16 a place to feature some super cute holiday themed things Simone brought home from school.


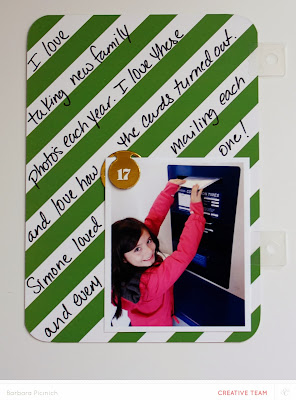
Day 17 our holiday cards, a simple insert of just the card with my notes on the back.


There's still time to get in on the holiday fun if want to capture your holiday season.  The Studio Calico kits are still in stock and I cannot recommend it enough.  It's been a delight to work with and you won't be disappointed.  You can find the kit here, the album here and the protectors here, here, here and here.

I hope to be back before Christmas with another update so until then, Merry, Merry!

post signature

Friday, December 13, 2013

2014 Studio Calico Creative Team

It's a really big night over at Studio Calico, for many reasons.  The 2014 Creative Team was announced and I am beyond thrilled to be part of this unbelievably creative group of women.  I mean look at this line up...

You can read all about the new team on the Studio Calico Blog here.  I will be part of the Project Life® team and can't wait to jump in and get started. It's going to be a really, really fun year.

The other bit of exciting news was the sneak peek at the January 2014 kits, they are amazing! You can see them all here.

I'll be back soon with lots more to share, once I catch my breath.
post signature

Tuesday, December 10, 2013

Thank you Elle's Studio

So I haven't shared a Project Life® spread in a while and the reason is the last week I completed I did for Elle's Studio.  I am their guest designer for December! Exciting stuff!  Here is a link to Elle's Designer Gallery where you can see all the stuff that her team made this month, its all pretty fabulous.

Here is what I made for her;


Her November kit was full of great stuff for a Thanksgiving spread and it was a lot of fun to work with.


This title card came with just the November printed on it.  I found a similar font and added the rest myself and just printed it right on her card.


I also did two layouts, this one using her super cute December kit that just went on sale today along with parts of her Noel line.


The second layout was using her boy themed kit, Cameron. 


Thanks so much Elle for having me, it sure was a lot of fun!
 
For information regarding the Project Life® style of scrapbooking you can find out more information from Becky Higgins here.

post signature

Monday, December 9, 2013

December Daily 2013 - days 6, 7 and 8

This past weekend we took a trip to Lake Tahoe, it was absolutely gorgeous and well timed for lots of snow.  I was lucky and got some really great shots and everything I included on these pages were taken with my iPhone 5.

Day 6


I placed the journaling in the middle printed on vellum.


Day 7


This day was magic! Simone had a blast and there was so much great stuff to include but I held back and just added these few images. The Let it Snow is from a digital card from Oh Snap Boutique I just modified it in Photoshop to just use the text.


The digital pieces on the insert are from Studio Calico this month and can be found here and here. I opted to attached the photos to the outside of the bag instead of slipping them in.


Day 8


We will miss Tahoe, the cold temps not so much but it's pretty cold at home still.  This week is crazy busy so I'll do my best to stay caught up.

See you soon.
post signature

Friday, December 6, 2013

December Daily 2013 - day 5

So here I am breaking the rules again, the hanging of the outdoor lights, didn't happen today but that's okay, it happened and its holiday related.


The spread is super, super simple and some days that's exactly what I need.  I adored this photo of Simone and had to make it nice and large. The deck the halls is a cut file from Studio Calico that was previously available and I decided to cut it on red glitter paper with my Cameo.  Everything is better with glitter.  This paper is from Best Creations and it does cut on the cameo but you have to be careful with the blade settings, this was set on 9 and it had to be double cut.  I added a bit more red glitter with some ribbon from the kit and the gold five to decorate things up just a bit.

Have a great weekend!
post signature

Thursday, December 5, 2013

December Daily 2013 - days 3 & 4

Sharing two days because they both ended up being single pages and they are sort of related.

Here is day three, we took Simone out to lunch after school and saw a matinee of this super cute new movie.  It was adorable! The background is printed on silver vellum paper which is lovely in person, I kept the photo small and added her ticket and a little post it I found at the dollar section of Target.  I love the mix of the silver and gold here a lot.


Day four was another movie but this time just for me.  I've never seen this movie on the big screen before and had to jump on it while it was showing.  I found the movie images online turned them all black and white and made a contact sheet digitally using a template.  I hand stitched the green around the edge and just added my ticket the gold four and a piece of chalkboard washi that tied in the black.


Here are the two days side by side


I added a little doily cut from a larger sheet of vellum in the middle of the two for a bit of separation.  I cut the white center sections on my cameo to add to the middle on each side.


So far so good, how is it going for you?

post signature