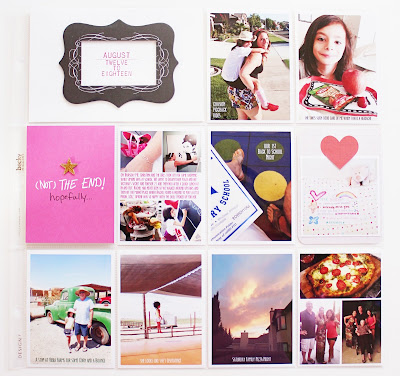
The last hurrah so to speak with our visiting family so I had a lot to include and most of it made it in.
I tried as best I could to stay with a black, white and red theme this week so all of the cards I pulled from my Studio Calico kit were in that color palette. My insert threw off the theme a bit but it's all good. This is probably the first and last time you'll see my butt in my spread (hopefully). We had a crazy, crazy hot day, happily we moved to the morning kinder class and we're all super happy about that. My nieces hitting up my makeup stash, summer ladybugs, lots of party prep and a tasty bottle of wine.
It's always funny when my family comes to stay, us girls always end up obsessing about one phrase or theme the whole time and this year was no different and a certain movie was the focus. We had a great day trip in to Alameda one day and shopped and ate and quoted our hearts out. The card on the top right was made using a Studio Calico stamp image that I purchased digitally and a super cute piece of home town flair I bought that day. I wanted to pay homage to our town in some way on the spread and I totally love it. The bottom half was centered around a day my husband and sister in law took their mom out gambling. She loves it and had a blast that day. I made the photos black and white because the colors were a bit off due to the inside light and the clashing colors but still left some color popping out on the slot machine and the playing cards. I love how this looks and it worked with the black and white card up top.
Up top one card flips out and explains the quote above it a bit better and let me squeeze in a few more photos.
We had two big events on Saturday a soccer jamboree for Simone and a family outdoor movie party that same night so I used one insert for them both.
Luckily for me two parents took some great shots during the game so they get credit for the top and bottom shots. I did get the one of her with the giant soccer ball on our way to the team pictures. Simone had a great game and the journaling card flips out and has a screen grab of my texts with my husband before he rushed to the game to see her make two more goals. One of the parents happened to film her making one goal so that's where the QR code leads too.
The backside is for the movie night, so much fun was had by all. I wish I had remembered to take pics before it got really dark so our next movie night will start a bit earlier so I can get some better shots.
On Monday our family went home so its super quiet here now so we're slowing getting back into our routine. I hope you have a great rest of the week!

Wednesday, August 28, 2013
Wednesday, August 21, 2013
Project Life 2013 - week 33
So much going on this past week, the biggest being my daughter's first day of Kindergarten! I made a separate insert for some photos and can't wait to start her school album for all the stuff I'm sure I'll be collecting over the years.
Here is the full spread, I used quite a few cards from the Studio Calico Mark's & Co. kits and lots and lots of photos.
I kept the title card simple this week, seems to be a pattern with me but you know, go with what works right. Of course I got hit with a migraine but my trusty nurse/doctor was ready and willing to take care of me. The pink card flips up with some more photos and text if you're wondering what that's all about. I ended up with more collages than normal, it happens when you're super busy and have lots to include. I adore the little note my niece left for Simone one day. Its one of two and I need to remember to track down the other one and at least take a picture before it gets lost. The coolest truck ever to take photos with except it was filled with hornets and lots of nests so we snapped and skedaddled quickly. Oh and we're eating lots of yummy food!
If you're curious about the little school house box Simone is carrying, its a printable from Claudine Hellmuth from her Etsy shop. I filled it with some treats for the teacher and it was a big hit.
I hope you have a great rest of the week and if you're kids are starting back to school I hope they have a really great day and year.
Here is the full spread, I used quite a few cards from the Studio Calico Mark's & Co. kits and lots and lots of photos.
Squeezing as much fun as we can into our days while our family is here visiting. Thankfully our summer weather came back as we hit the weekend.
I kept the title card simple this week, seems to be a pattern with me but you know, go with what works right. Of course I got hit with a migraine but my trusty nurse/doctor was ready and willing to take care of me. The pink card flips up with some more photos and text if you're wondering what that's all about. I ended up with more collages than normal, it happens when you're super busy and have lots to include. I adore the little note my niece left for Simone one day. Its one of two and I need to remember to track down the other one and at least take a picture before it gets lost. The coolest truck ever to take photos with except it was filled with hornets and lots of nests so we snapped and skedaddled quickly. Oh and we're eating lots of yummy food!
This is the insert I made for Simone's first day of school. I took a stab at creating a digital background with a stamp for the first time. The stamp comes from a super cute little set that Studio Calico slipped into my box this past month. It was a little freebie they sent to all of the Rewards Members as a thank you, how nice is that! I stamped the image on a piece of cardstock and then scanned that image to create a digital stamp. I stamped them randomly and in different sizes and colors and printed my two favorite pictures from the morning for the front. I printed another frame out on the same cardstock for my little title and used a whole bunch of foam tape to lift it all off the page. I added a few gold glitter stars from the Studio Calico Atlantic Collection and then stamped one of the sentiments that came with the set in the upper left.
I made another larger collage of a few more photos and added sweet poem that a friend shared with me that day for the backside.
If you're curious about the little school house box Simone is carrying, its a printable from Claudine Hellmuth from her Etsy shop. I filled it with some treats for the teacher and it was a big hit.
I hope you have a great rest of the week and if you're kids are starting back to school I hope they have a really great day and year.
Wednesday, August 14, 2013
Project Life 213 - week 32
So week 32, I can't believe I got you done relatively on time. We have family visiting so its always hard to take time away to do this kind of stuff but I know if I don't it will just start to pile up. So here is the week...
My August Studio Calico kits arrived on Monday, just in time for me to use and I must say there were so many amazing parts to the kits that I had a hard time choosing which pieces to use. I have a feeling my Project Life kit will get some major use. The title card, the letterpress card below it and the card with Simone and her sweater are from Studio Calico August kit. I stuck to my usual, lots of photos and managed to get all the stories I really wanted to tell in there.
I saw Nicole Samuels had stitched on this adorable heart card and I loved it and when it worked so well with my spread I decided to use it. I stitched with gold embroidery floss which I must say is a major pain to work with. I managed to get thru the whole thing and I do love how the little bit of sparkle looks.
I used three more August Studio Calico cards on this side, all down the middle. The school cards I knew would get used for sure these next few months and the rest of the pink just worked.
I hope you all have a great rest of the week, if you have any questions, please don't hesitate to ask.
Wednesday, August 7, 2013
Project Life 2013 - week 31
I seriously cannot believe we are in to August already. It's about to get super busy for us so I hope I can keep up, fingers crossed! We shall see how it goes between visiting family, starting soccer, starting school, you know the usual.
Here's what I ended up with for last week.
It's always fun on Monday's when I sit down and see what I have and then figure what's going to go where. It's like a puzzle each week, so many different ways of building it too. This side is a jumble of three different days, Monday, Sunday and Thursday as we move clockwise. One thing I do is always try to keep in mind when I'm shooting photos to take some horizontally for this particular side. 99.9% of the photos I shoot are vertical so its a must to remember or I will have nothing for these middle horizontal slots. The slot with the business card is a fun one. I wanted to include the card but that meant losing a slot for journaling and/or another photo so I typed up the journaling on the base card, printed a photo and mounted it to the underside of the business card and taped the card to the outside of the protector so it covered the journaling below. As you'll see when you flip it up, you can see the photo and the journaling.
One thing I played around a lot with this week was editing my photos in different ways. I use Rad Lab for all of my photo edits either on my computer or using my phone and their PicTapGo app. It's become my favorite way to edit them and its beyond easy to use. I typically just use the Lights On and either Oh Snap and Punch Out but I did a little experimenting this week. For the top two photos in particular I used Lights On, Punch it Out and then Claire-ify making some slider adjustments along the way. It's definitely a more processed, over saturated and a bit blown out look but I do love the affect. The photo of my new shoes was intentionally blurred when I took it so you could see the sparkle more and once the edits were added it really made the sparkle really pop in person.
I played around with some black and white filters of the one of my daughter drawing on the ipad and I loved the look of her in black and white but I wanted her drawing in color. To achieve this in my layers pallet I had the original color photo as the first layer, then the black and white edited photo on the layer above, I then used the eraser tool and carefully erased the black and white image from the ipad area only exposing the color version below.
I did basically the same for the photo next too it of the library books. I found an image of a library due back card online and erased the white parts making a transparent .png image. I laid that image on top of my photo and erased the lines from the top of the books so you could still seem them clearly. It's a neat way to add a little something extra to a photo.
The Toolbox class over at Studio Calico is in full swing and this week is all about digital, Monday was all about templates and I know another new lesson was uploaded today. I look forward to hitting the classroom to see what Shanna has done for us. Shanna also schedule a chat for class members tomorrow (8/8) at 8:00pm PST so if you're taking the class, make sure you join the chat. She will be answering questions and just sharing about all things digital so maybe I'll see you there.
I hope you have a great week!
Subscribe to:
Posts (Atom)